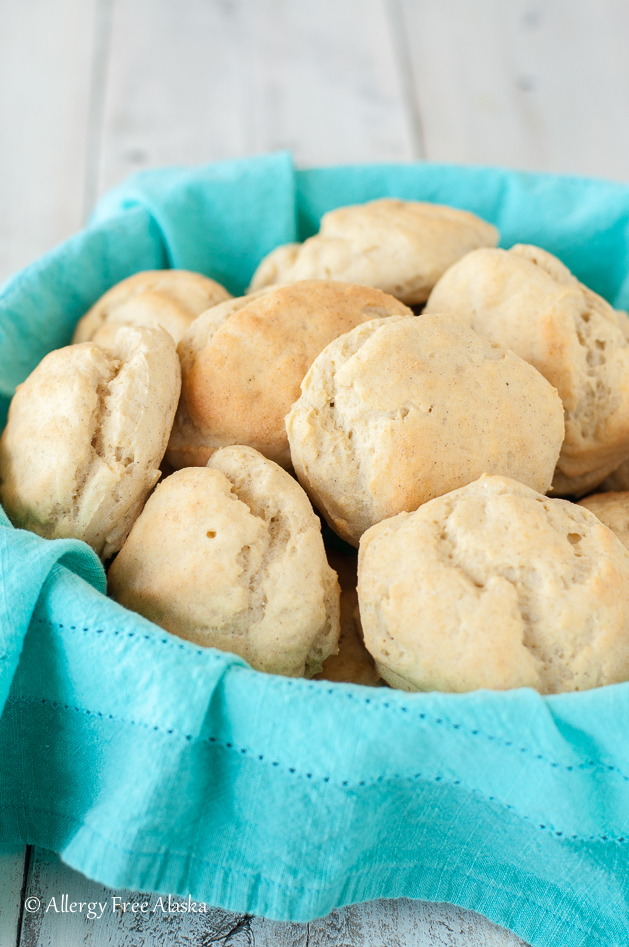
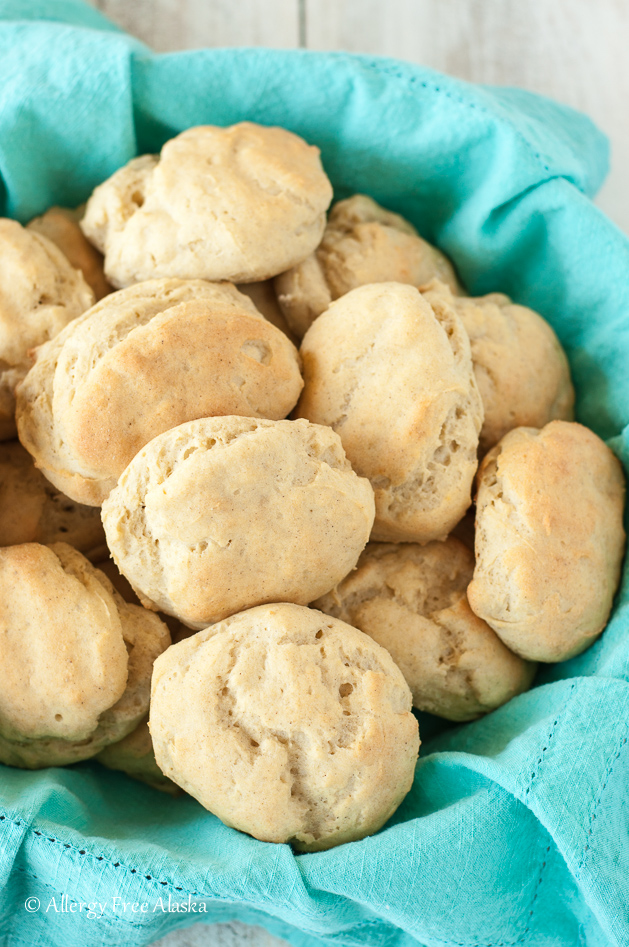
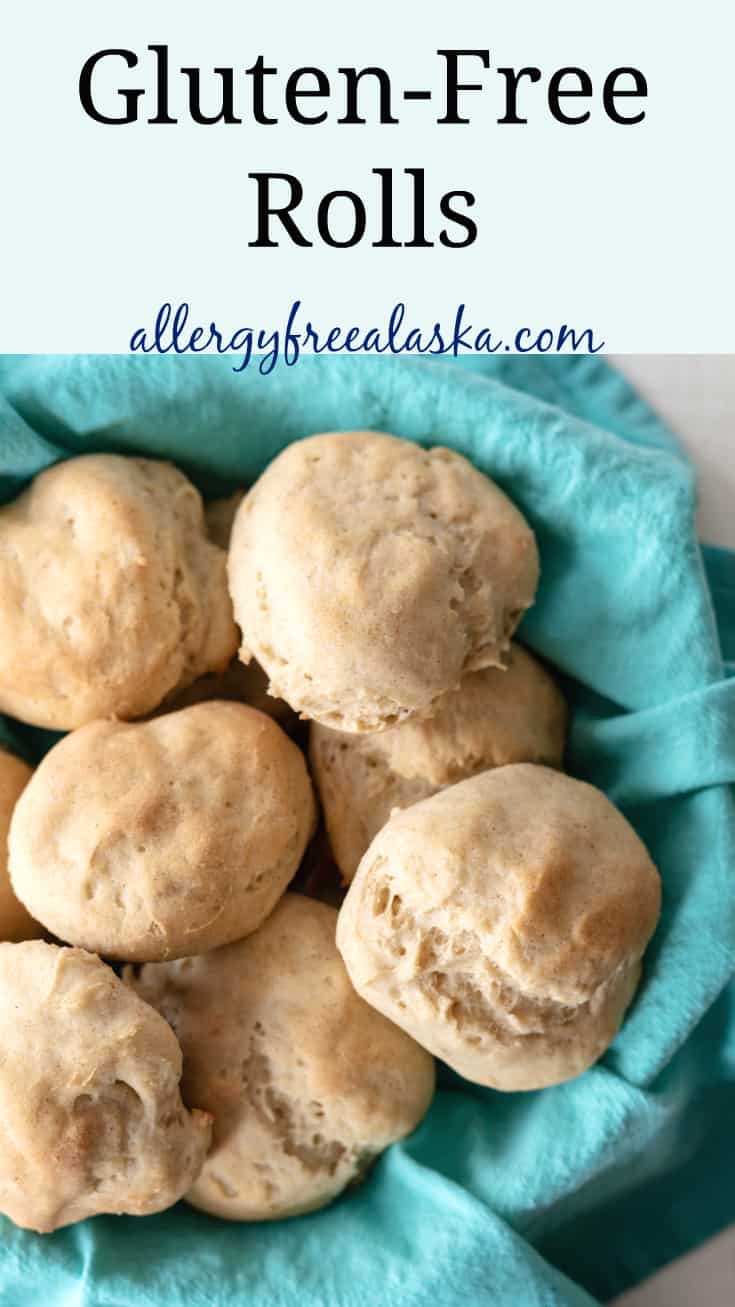
I make these gluten free rolls for every holiday gathering and they are always a hit. They are soft and fluffy, and are the perfect vessel for those post-holiday leftovers. Bring on the ham and turkey sandwiches!
The hardest part about making this gluten-free rolls recipe is choosing the flavor: plain, garlic & rosemary, or onion (I include directions for all 3 flavors below).
I love all three flavors, so it’s hard to tell you what my favorite is!
Gluten-Free Rolls
Who can resist the delectable smell of freshly baked gluten-free bread rolls wafting through the house? I definitely can’t! In fact, when our girls are grown, I hope the scent that gives them a sense of nostalgia is freshly baked gluten-free bread.
When I first went gluten-free, it was so hard to find gluten-free bread rolls that actually tasted good. I wanted fluffy rolls… the kind of rolls that are a piece of soft heaven when you take a bite. The kind of gluten-free yeast rolls that weren’t dry and crumbly but were so tender they practically melted in your mouth.
After recipe testing for months, I finally created a recipe that was so tasty and delicious it nearly made me cry!
When Thanksgiving came around I was elated to have delicious gluten-free dinner rolls that sopped up turkey gravy and those leftover bits of turkey and sweet potato and gluten-free stuffing from my Thanksgiving Day plate.
Speaking of Thanksgiving, I can't wait to try this easy no fail brined turkey. Doesn't it look amazing?
Tips for Making Gluten-Free Dinner Rolls:
- If you’ve never made wheat-free bread before, it’s important to remember your gluten-free dough is going to be much wetter than a gluten-filled dough. Don’t second guess the recipe and add additional flour, otherwise you’ll end up with a denser roll.
- Make sure all ingredients are at room temperature (including the flour, eggs, yeast, nuts, seeds, etc). I let my “cold” ingredients sit out on the counter for 20 – 30 minutes before I start baking.
- Use the mixers paddle attachment (flat beater) when mixing gluten-free bread dough, not the whisk attachment or break hook. Gluten-free bread requires no kneading (for the most part – there are a handful of recipes out there that do), so no bread hook is required.
- The bread loaf, rolls, or muffins will rise a little bit more during the baking process and will appear nice and golden brown when done.
- To double check that a yeast loaf or yeast rolls are finished baking, use an instant read thermometer to check the internal temperature. A perfectly baked yeast loaf will reach an internal temperature of 202 degrees (F).
- Always bake on the middle rack in your oven!
Active Dry Yeast
Active dry yeast can be very unstable, so make sure it’s fresh (not expired) and becomes foamy when proofed. If the yeast isn’t foamy once the proofing time is up, either the yeast is bad or the water isn’t the right temperature. Throw it out and start again.
Do I need an electric stand mixer to make gluten-free dinner rolls?
Yes. You need an electric stand mixer like a Kitchen Aid or something similar. Gluten-free bread dough has to be whipped/mixed well to get air into the dough and to create a perfectly smooth texture. This cannot be achieved by stirring by hand or by using an electric hand mixer.
How to Make Gluten-Free Rolls
- Combine the dry ingredients, this includes all of the gluten-free flours, starches, xanthan gum, sea salt, and spices (if using them for the flavored rolls).
- Whisk together the wet ingredients.
- Proof the yeast.
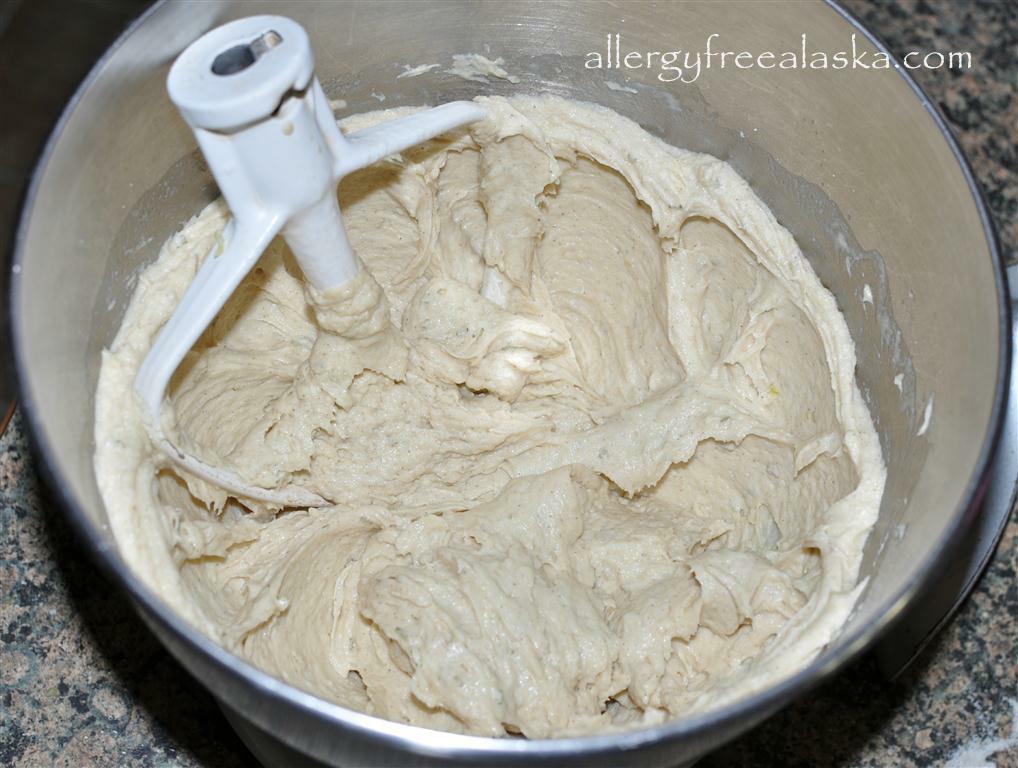
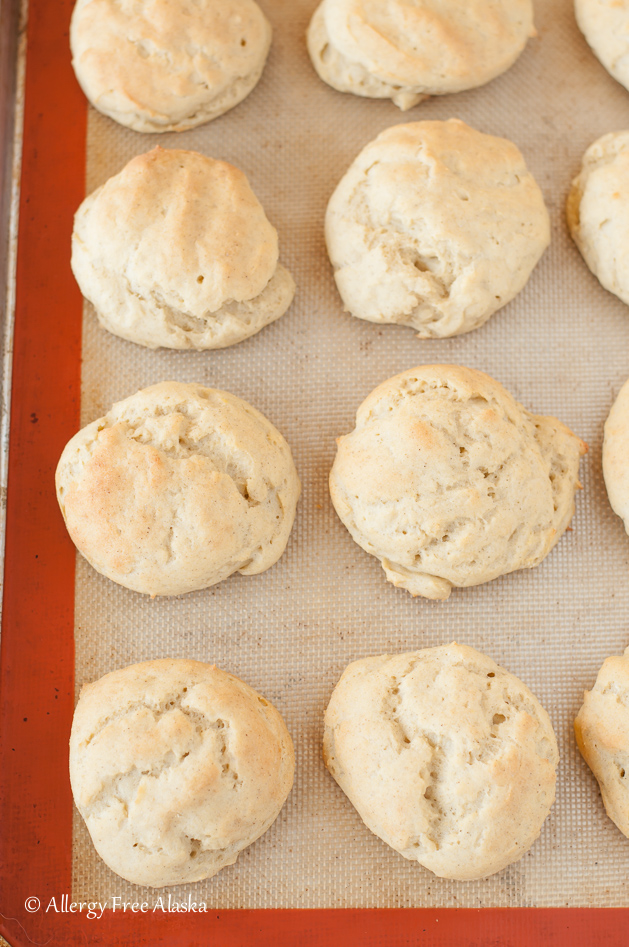
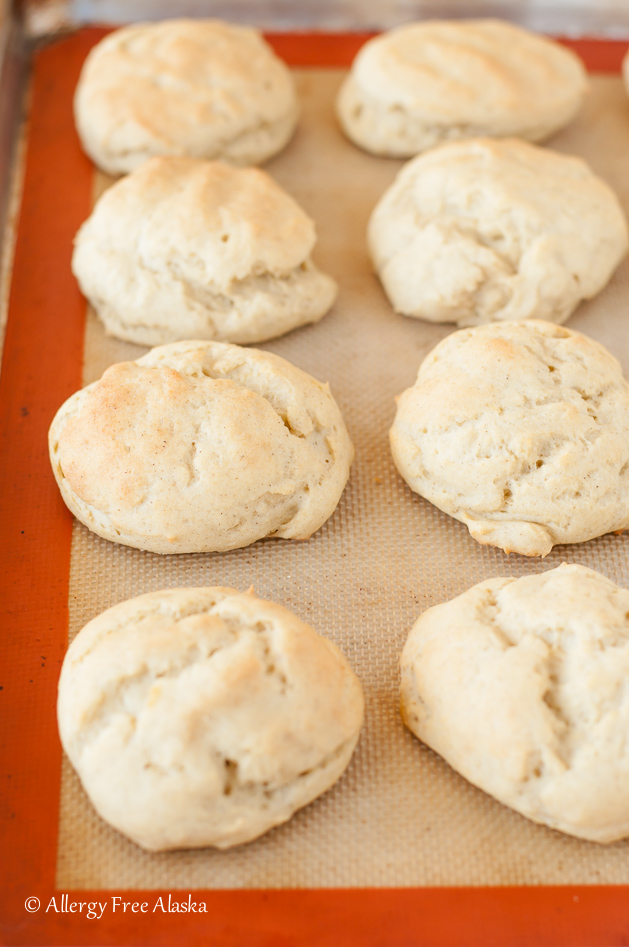
- Mix it all together. See the picture directly below to see the consistency you want your dough. Note that the dough is a little wetter than what you would expect, more like a cookie dough batter, but thick enough to cling to the sides of the bowl and hold its shape when scooped onto a baking tray.
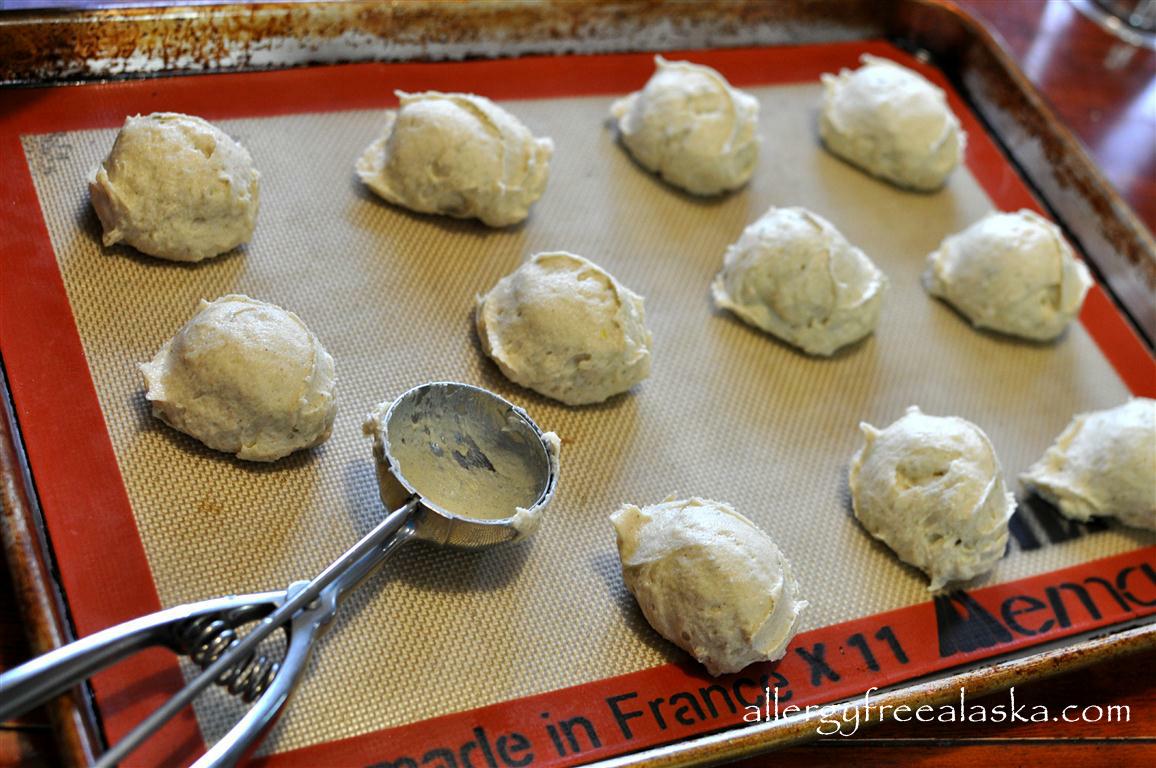
- Drop the dough balls onto a parchment or silicone lined baking sheet.
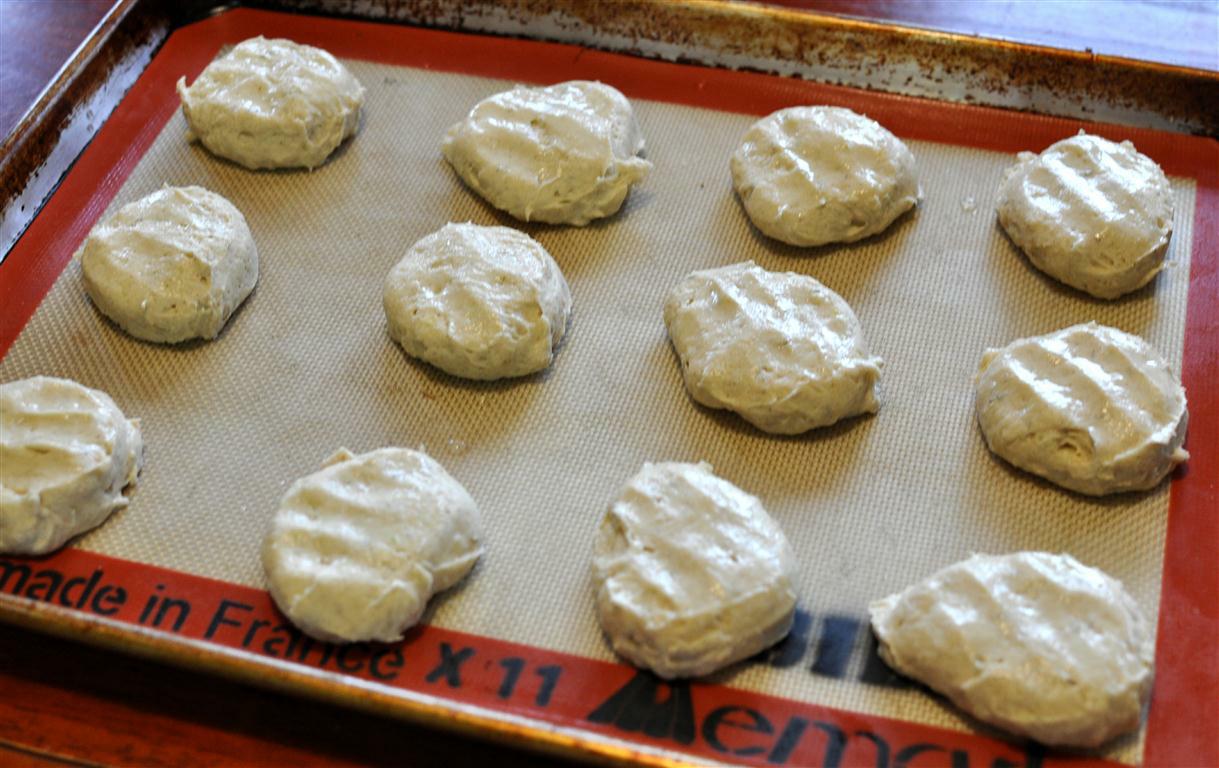
- Wet your fingers and flatten each ball of dough so that it’s approximately ¾-1” thick.
- Rise.
- Bake.
It really is that easy!
Gluten-Free Slider Buns
Rolls are (obviously) excellent slathered with dairy-free butter, but this gluten-free recipe also doubles as the perfect slider bun.
A slider is any kind of small sandwich - from tiny burgers, to any kind of shredded meat sandwich.
For gluten-free sliders, I like to make Instant Pot Pulled Pork, and shred the meat. Then I fill the gluten-free rolls with pulled pork, a little bit of barbeque sauce (we use Stubbs), and crunchy coleslaw (I use this recipe by Robert Irvine, but sweeten my coleslaw dressing with honey to taste vs. white sugar). They are exceptional, and everyone loves them!
I also like to make my Instant Pot Chuck Roast and shred the meat. Then I fill the gluten-free rolls with shredded beef, caramelized onions, and sautéed mushrooms. It is soooo good. The cooking juices from the Instant Pot Chuck Roast can served with the sliders as a dipping sauce. Like French dip, just in slider form!
If you’re looking for a larger-sized sandwich roll, try my gluten-free hamburger buns.
How to Store Gluten-Free Rolls
I keep my gluten-free rolls stored in a bread bag sitting out on the counter; however, if you live in a warm climate, you may need to store your rolls in a cool dark cupboard or the refrigerator.
Most of my gluten-free bread recipes stay fresh at (Alaska) room temperature for at least 2-3 days. If I know I won’t use my rolls up within 2-3 days, then I slice the remaining portion, wrap it in plastic wrap, place it in a freezer bag, and store it in the freezer. When I need gluten-free buns, I leave them out on the counter to thaw at room temperature and use them within 24 hours.
Gluten-Free Frozen Rolls
Let’s face it; frozen gluten-free dinner rolls are awfully convenient! While these rolls are best the day you make them, they do freeze well, which comes in handy when you are planning a big meal for a holiday. Place baked and cooled rolls in an airtight container and freeze. Thaw at room temperature.
I hope you enjoy these gf rolls as much as my family does! I don’t know about you, but I've never looked forward to leftovers as much as I do now, because these gluten-free dinner rolls mean amazing post-Thanksgiving turkey and ham sandwiches!
xoxo,
Mēgan
Gluten-Free Rolls recipe:
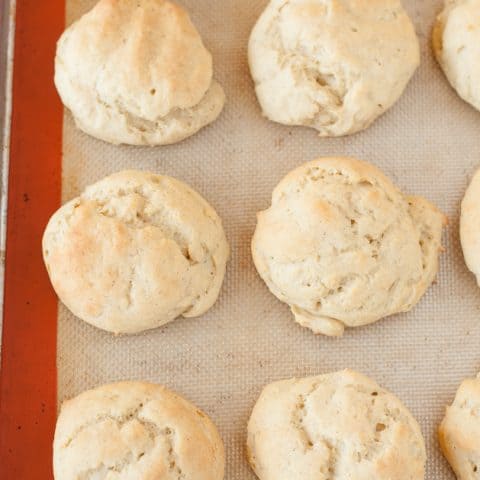
Gluten Free Rolls
These Gluten Free Rolls are soft and fluffy, and are the perfect vessel for those post-holiday leftovers (bring on the ham and turkey sandwiches!).
Ingredients
Yeast Ingredients:
- ¾ - 1 cup hot water, divided (between 105 - 115 degrees F)
- 1 tablespoon honey
- 1 ¾ teaspoons dry active yeast
Dry Ingredients:
- 1 cup sorghum flour
- ¾ cup brown rice flour or millet flour
- ½ cup tapioca starch
- 1 ¾ teaspoons xanthan gum
- 1 - 1 ¼ teaspoon sea salt
Wet Ingredients:
- 2 eggs
- 2 tablespoons olive oil
- ½ teaspoon apple cider vinegar
For Garlic & Rosemary Rolls add:
- 1 teaspoon dried crushed rosemary
- 2 garlic cloves, minced
For Onion Rolls add:
- 2 tablespoons dehydrated onion flakes
- 1 teaspoon onion powder
Instructions
- To proof the yeast, combine the honey and warm water in a small mixing bowl and stir until the honey is mostly dissolved. Sprinkle in the yeast and give it a quick stir. Allow the yeast to proof from 7-10 minutes; it should be foamy. Make sure you have the other wet ingredients mixed and ready to go when the yeast is done proofing.
- Using an electric mixer with a paddle attachment, combine the sorghum flour, brown rice flour, tapioca starch, xanthan gum, and sea salt. If making one of the flavored rolls, also include either the rosemary and garlic, or the onion powder and dehydrated onion, at this time.
- In a separate mixing bowl, whisk together the eggs, olive oil, and apple cider vinegar.
- When the yeast is done proofing, add the wet ingredients to the dry. Stir on low and slowly add the yeast mixture. Continue to mix on low for 30 seconds. Scrape down the sides of the bowl, then mix on medium for 2-3 minutes or until the dough is smooth. If needed, continue to add warm water, tablespoon by tablespoon, to achieve the consistency of a thin cookie dough batter (see picture in post above for a visual representation of this). The dough will be wetter than a gluten-fill dough, but must be thick enough to cling to the sides of the bowl and hold its round shape when scooped onto a baking tray.
- Using an ice cream scoop, drop the dough onto a parchment or silicone lined baking sheet (they should be a little bigger than the size of a golf ball).
- Wet your fingers and flatten each ball of dough so that
it’s approximately ¾-1” thick (keep wetting your fingers as you go along so that the dough does not stick to them). - Allow the rolls to rise for 1 hour.
- Preheat the oven to 375° (F). When the oven is fully preheated, baked the rolls for approximately 17-19 minutes. When finished baking, they will be golden brown and the internal temperature will be 202° (F).
- Remove the rolls from the pan to a wire rack. Allow them to cool for at least 15-20 minutes before serving.

Danielle @ Fresh4Five says
They look beautiful! I think I can smell them from here 🙂
Megan says
Thanks, Danielle!
Kirstie Starr says
These look lovely, thank you!
Megan says
You are so welcome, Kirstie!!
Hugs,
Megan
Queen of Quinoa says
Megan, these rolls look stunning. Exactly what I need for e upcoming holiday season! Can't wait to give them a whirl and play around with different flavor options.
Megan says
Thank you! I can't wait to hear how you like them!
Hugs,
Megan
Laura says
These look like the dinner rolls I used to gobble up every Thanksgiving growing up. I can't wait to make these when I am all settled in my new kitchen in a few weeks. Seriously Megan, these look scrumptious! Perfect with ghee or butter right on top!
Megan says
Thank you, Laura! That is exactly what I was trying to re-create - the rolls of our childhood! 🙂 I hope your packing and moving is going smoothly. I've been thinking of you!
Hugs,
Megan
Dr Cohen says
Thanks a lot for the recipe, I'll definitely try this out tomorrow.
Carolyn says
Megan,
What can I use to replace sorghum flour? More brown rice flour?
Thanks!
Megan says
Hi Carolyn,
Yes, you can use brown rice flour to replace the sorghum flour, but make sure you at least use 2 different flours (like brown rice and millet). I don't recommend using straight brown rice flour.
🙂 Megan
Carolyn says
Thanks Megan!
Shirley @ gfe says
Those rolls look divine, Megan! I'd probably like the onion flavor best, too. 🙂
xo,
Shirley
Megan says
Thanks, Shirley!
xo
Anne says
I think I'd have to vote for the garlic & rosemary. I hope I get time to make these before Thanksgiving!! Thanks for the recipe!
Hanunyah @ Ranch Girl's Sweets 'N' Treats says
These look lovely! I'm stopping by from a link party . . . not sure which one actually ;).
Beautiful!
Susan says
I just made these for my son who has to be casein free and I have to say they tasted great. Thank you for the recipe. Do you know if these can be frozen?
Megan says
Hi Susan,
You are so welcome! 🙂 I'm glad you enjoyed them! I have not yet tried to freeze these rolls; however, I think they would freeze okay. I'm actually going to make a triple batch of these before Thanksgiving and freeze them, so I'll be able to test it and report back.
🙂 Megan
Susan says
Great! Thanks Megan
Amanda says
We loved them. How did the freezing experiment go? We will be traveling for Thanksgiving, but I still need to bring the bread. Has anyone tried to make these pull-apart?
Megan says
Hi Amanda,
😉 So glad you enjoyed them! And I normally double or triple the batch and then freeze them (for holidays). They freeze and thaw beautifully - I let them thaw at room temp out on the counter. I have not tried making these as pull apart rolls, although I think they would do great made that way.
😉 Megan
Danielle @ Poor and Gluten Free says
These look wonderful! I love that they look so simple, too, without a ton of ingredients.
Thanks so much for sharing this on Waste Not Want Not Wednesday, it’s been pinned on my pinterest board and don’t forget to check back to see if you’ve been featured this week 🙂
amber says
Megan,
You're amazing when it comes to baked goods, really. These look so perfect.
These really made an impression on AFW last week - this was the most viewed recipe! Well done.
Hugs to you and hope you have a fabulous Thanksgiving.
Hugs,
--Amber
Megan says
Amber,
You are so sweet - thank you! 🙂
Happy Thanksgiving to you and your family!
xoxo,
Megan
Cultured Palate (@culturedpal) says
This sounds great and especially with holiday dinners! I would love to have you share this on Thursday at Tasty Traditions: http://myculturedpalate.com/
Megan says
Thank you! I'm sorry I missed the linky party this week - I will try for next week!
Lauren says
These were very, very good! Awesome taste and texture. Thank you for sharing a wonderful recipe. Also, as I was browsing your blog, I noticed that you referenced Psalm 73:26 in one of your blog entries. It was such a blessing and excellent reminder to me today--I too suffer from autoimmune disease. Thanks for your boldness and resolve to trust in the Lord.
Megan says
Hi Lauren,
Thank you for your sweet comment! Psalm 73:26 is what I cling to, especially on really bad days. It's my favorite verse! 🙂
Hugs,
Megan
PS - I'm very glad you enjoyed the rolls!
Sherri says
These are fantastic!! I have made them egg-free using chia seeds and water and they still turned out great. For hamburger buns I put the dough into a muffin top pan,smoothed out the dough to fill the well, and it worked well. Thank you for the recipe.
mary says
i see you use your own mixture of flours... have you ever tried a pre-mixed gluten free flour? i have cup4cup at home and also flour from Jules...
i wonder if i could use one of those?
Megan says
Hi Mary,
I have not personally tried either of those flours, but I'm sure they will work just fine.
🙂
Megan
Arleen says
These look awesome! And I just happen to have beef stew in the crockpot...
Deb says
Hello Megan - I just wanted to say THANK YOU AGAIN SO MUCH for posting such successful recipes! I made these buns for the first time on the weekend and they turned out so wonderful I could not believe - they had a texture like bread I remember.....that gooey gluten texture. So today I made the recipe again, but shaped into one focaccia loaf, brushed with olive oil and sprinkled with herbs and garlic and OH MY GOODNESS what a treat. if anyone is missing bread to dip into fancy oils and vinegars, this is the way to go, its amazing!
Thank you again Megan, I love your recipes and love that I no longer have to settle for 'OK' GF options, your recipes are so easy I can make them any time with always successful results!
Deb
Kelowna, BC
Naomi says
Hi! I made these and my family loved them. I decided to try the dough as the crust for pizza and it worked fabulously! Thank you so much. Love this recipe!
Megan says
Hi Naomi,
I'm so glad you enjoyed it - and thank you for sharing the info on the pizza crust! That's wonderful!
Megan
Debby S. says
I live in Colorado where altitude can be a problem when baking. Is there any adjustments to be made with your reciepes.
Thank You
Valerie says
Any suggestions for a good egg replacement for this recipe. I've use flax seeds in the past. Would that work for this?
Megan says
Hi Valerie,
I think a flax slurry or egg re-placer would work, but please keep in mind I haven't tried it myself. Others have used these substitutions in other bread recipes of mine (that are similar to this recipe) with success.
🙂 Megan
Maria says
Can I use king Arthur's All purpose in place of the mixture of flours listed? Thanks
Megan says
That should work just fine, Maria. Just check to see if King Authur's already has xanthan gum mixed into it!
Liz says
How do these rolls taste the next day? Do they dry out?
Megan says
Hi Liz! These are best the day of baking, but are still soft the next day. For Thanksgiving and Christmas I make a big batch of these ahead of time and freeze them. They freeze/thaw out really well!
Charlotte Moore says
How exciting to find a dinner roll that looks like a roll. THANKS!!!!
Laura says
Thanks for the awesome recipe. It worked perfectly for me!
Megan says
You're so welcome, Laura!! 😉
Julie says
I am very interested in making these and freezing them. Do you freeze them before they rise, after they rise, before baking or after they are completely baked? Thanks!
Megan says
Hi Julie,
I freeze them after they have completely baked and cooled.
😉 Megan
Caroline says
After thawing are they still soft or should they be heated to soften again?
Megan says
They are still soft, but warming them might soften them up a bit more. 😉
Connie says
I'm not too educated about this stuff.....can you use quick rise yeast? It was bought by mistake!
Connie says
You don't have to answer, I googled it and decided to go to store! Thanks!
Megan says
Hi Connie,
I responded earlier to your email... maybe you didn't get it in time, but here was my response:
I wouldn't recommend using the quick rise yeast. Every time I've used quick rise yeast I haven't had good results with my GF breads. I think it dries it out too much. ;(
Connie says
thank you for the quick response! I decided not to chance it. I just took these out of the oven. They smell heavenly....haven't had a bread smell here in a long time. 🙂
Can't wait to try them! thank you, thank you!
Connie says
these are so yummy! I can't tell you how happy I am to have a roll I can eat....I had a french dip last night I haven't had that tasted good in 3 years! I made them plain and can't wait to add the garlic! Thank You!!! Glad I found your site!
Megan says
Oh Connie... 😉 That makes me very happy! You're so welcome - very glad you enjoyed them (and your French Dip)!
Hugs,
Megan
Christine says
Hi Megan,
These look deeelish! Do you think they would work with egg replacer? Or even with a flax or chia "egg"?
Megan says
Hi Christine,
I'm really not sure since I've never tried it before, but if you do try it, I'd be more inclined to recommend the egg replacer. Good luck!
Megan
Stephanie says
Looks delicious!! Thank you so much for linking up at Tasty Tuesday! Your recipe has been pinned to the Tasty Tuesday Pinterest board! Please join us again this week!
evelyn says
Would guar gum work instead of xanthan? Also is a yeast free version possible? These look great. Most recipes I found look like muffins.
Megan says
Hi Evelyn,
Yes, you can use guar gum, but I don't recommend making this recipe without the yeast. Maybe try this recipe instead: Gluten-Free Yeast-Free Flat Bread.
Lola says
Can I use maple syrup in place of honey? I am on the FODMAP diet and can't have honey. Thank you
Megan says
Yes - you bet!
olivia says
Can I freeze them (Uncooked of course)!?
olivia says
Or freeze them cooked?
Megan says
Yes, they freeze great, just bake them first. 😉
Ingrid Brown says
I was wondering if you have ever baked this recipe into a loaf with success?
Megan says
Hi Ingrid, not this specific recipe, but I modeled this recipe off of my Gluten Free Rice Free Multigrain Bread recipe. I'd imagine it would work okay as a loaf.
Alaskankat says
FYI ... I have several vegan friends .. they do not use any animal bi-products even ... which means eggs, milk, cheese and honey. A gentle suggestion would be to mention vegans who use animal bi products. (I am not vegan so I will make this)!!
Heather says
The buns turned into flat discs. Was thinking the dough was too wet. Any helpful tips to avoid the flattening? Thanks so much!
Rachel Mazerolle says
These are delicious....I have tried so many recipes without success, these great and so easy to make. Thank you
Megan says
I'm so happy you enjoyed them, Rachel! Thanks!
Lesley Snyder says
I've used this recipe a number of times, and I love it, but I was wondering if I can double it. Have you tried?
Megan says
Hi Lesley,
Yes, I have doubled it! Works great - you just need to reduce the amount of yeast (don't double that). You might try 2.5 teaspoons - 1 tablespoon of yeast (total) for a double batch.
Angie Lockard says
Hi Megan!
Is there any reason that psyllium husk powder will not be a good replacement for xanthan gum in this or other bread recipes? I tried making your hamburger buns a couple times and couldn't get it to come out right (was too runny and flattened more like flatbread). I was wondering if it was the psyllium husk because I think that's the only adjustment I had made. (I may have also doubled it come to think of it, which probably caused problems.) Anyway, just want to make sure these come out right for Thanksgiving. 😉
Thanks for any suggestions! I love making your recipes, as always! 🙂
Angie
Mēgan says
Hi Angie! Wonderful to see your name pop up here! 🙂
I have never had success interchanging xanthan gum and psyllium husk in recipes. Whenever I've successfully used psyllium husk, I've had to formulate the recipe specifically for it. If that makes sense? I know years ago there was a very popular blogger that said the swap would work at a 1:1 ratio. Every recipe I tried it in failed. Through recipe testing I've found I have to use about 1 tablespoon of psyllium husk powder to equal the binding power of xanthan gum. But then it has other drying properties, so you have to compensate with more liquids, and sometimes more fat.
Regarding the hamburger bun recipe, yes, I do believe it was the psyllium that caused it to fail. If you did a 1:1 swap it just wasn't enough binding power.
Hope that helps! Hugs!
Megan